The web Browser you are currently using is unsupported, and some features of this site may not work as intended. Please update to a modern browser such as Chrome, Firefox or Edge to experience all features Michigan.gov has to offer.
Provider Guide for Creating a MiLogin Account
This guide is for child care providers participating in the State of Michigan’s Child Development and Care (CDC) Scholarship program who need to create a MiLogin for Citizens account to access the CDC I-Billing system. MiLogin is the State of Michigan’s one-stop login portal to access state systems individuals use day-to-day. In just eight (8) short steps, you can create a MiLogin account.
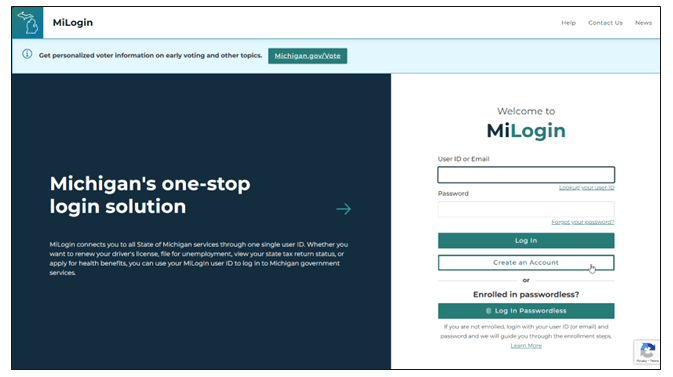
1. Go to, https://milogin.michigan.gov/ which is the MiLogin homepage to create an account for individuals. Click, Create an Account.
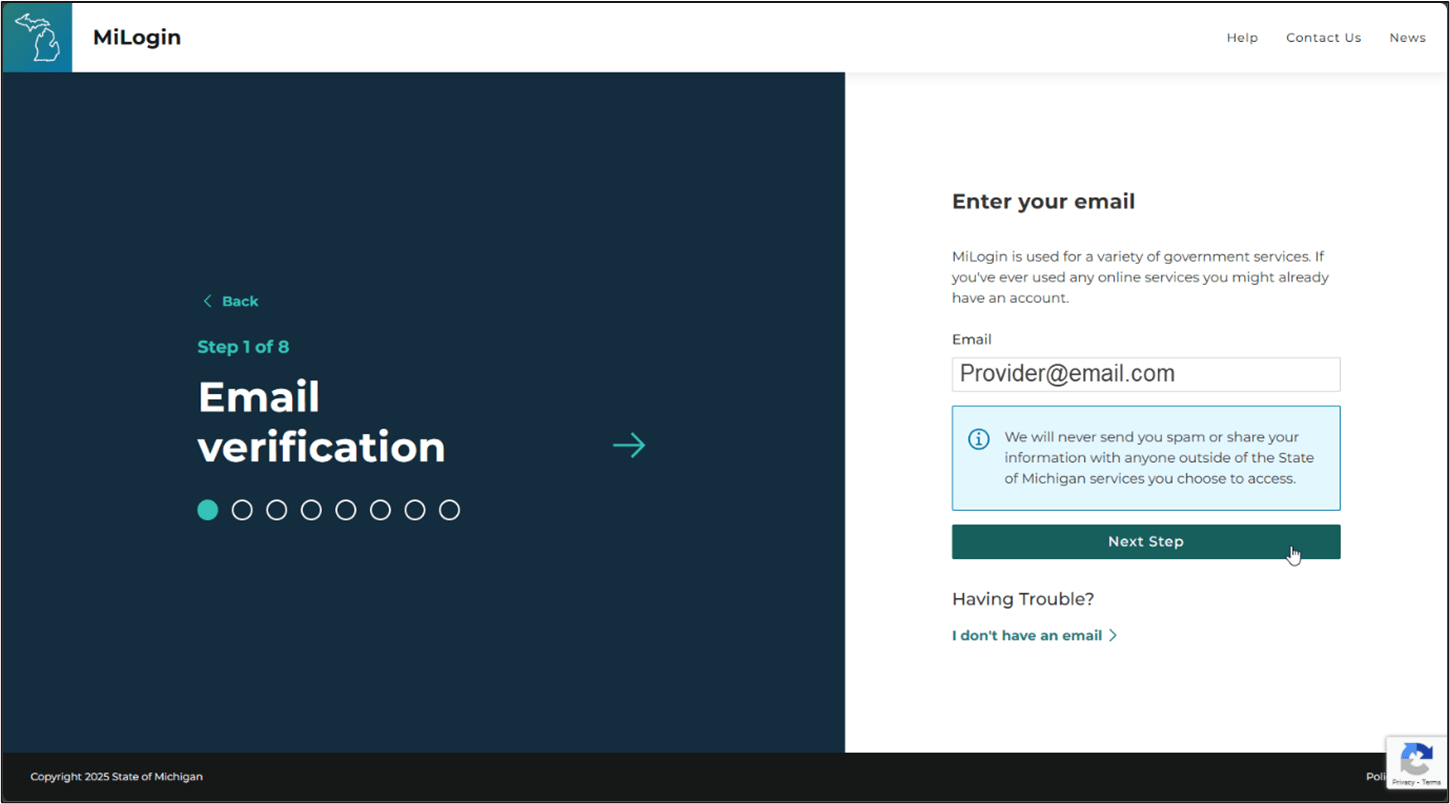
2. Next, you will be prompted to enter your email address. Enter your email address, and click, Next Step.
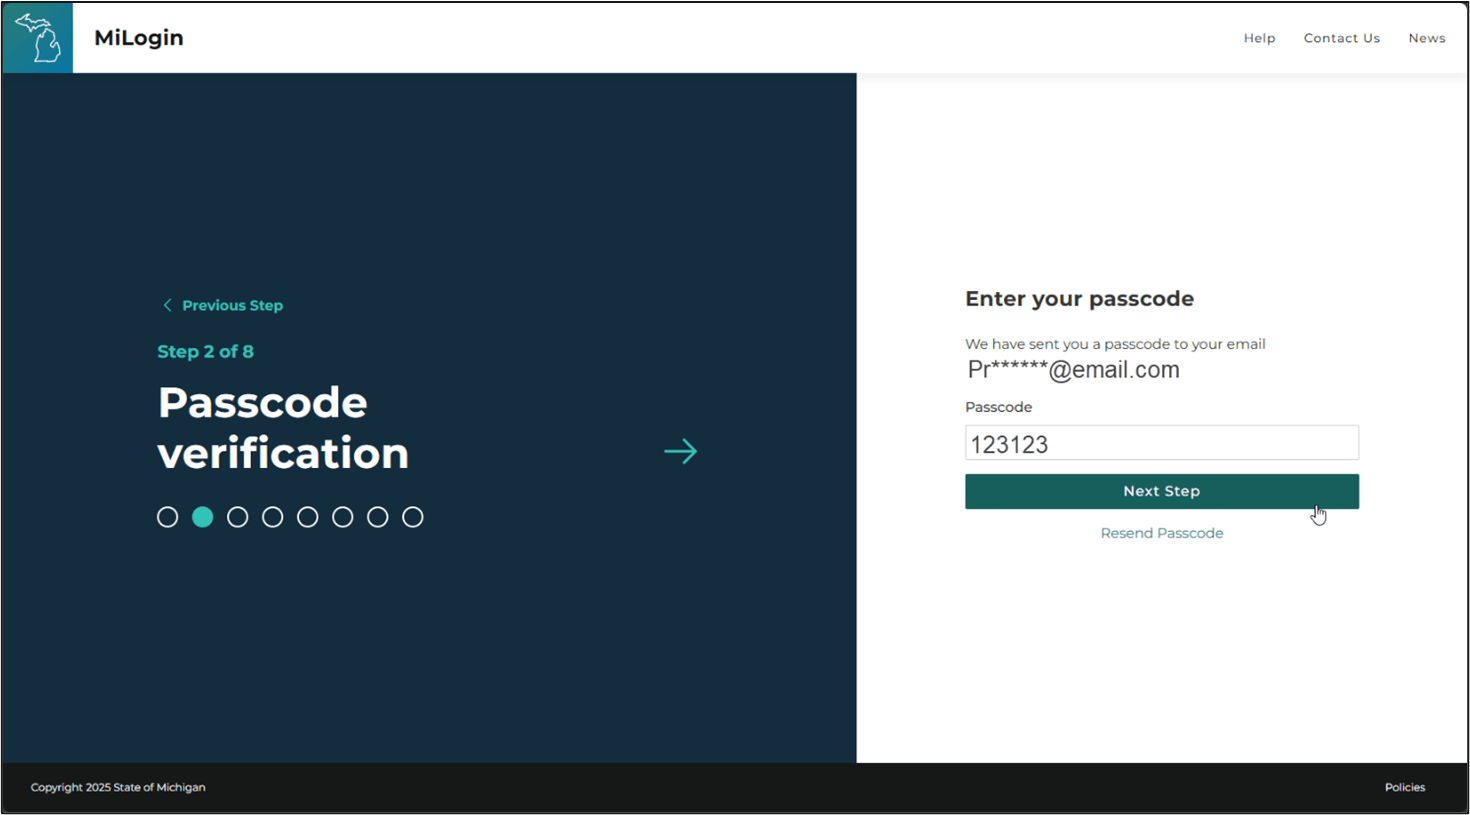
3. MiLogin will then send a passcode to your email address. Enter the passcode you received via email on the Passcode Verification screen, and click, Next Step.
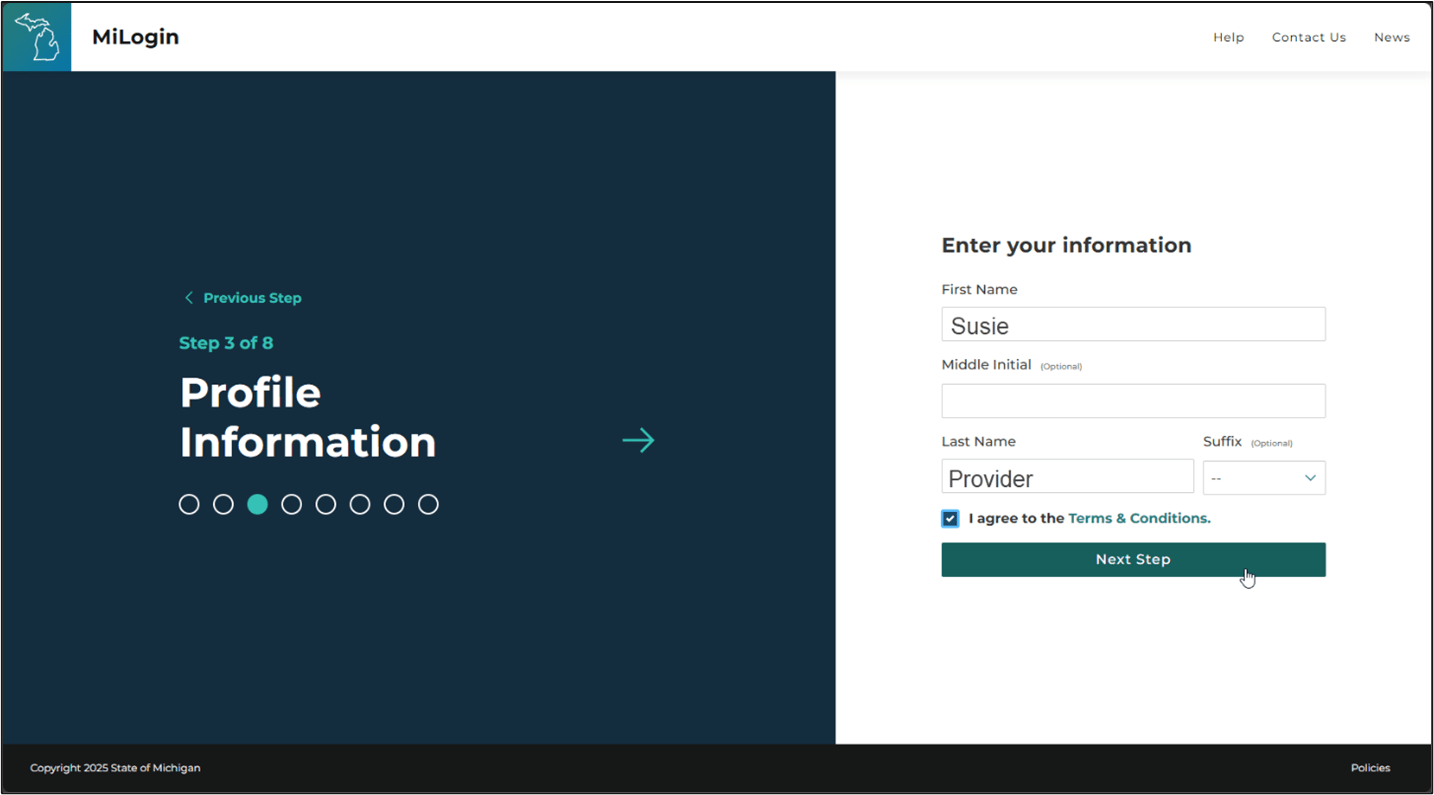
4. Now, you will be able to enter your name for your profile information. Once you have done that, check the box to agree to the Terms & Conditions, and click, Next Step.
5. Next, enter your phone number, then click, Next Step.
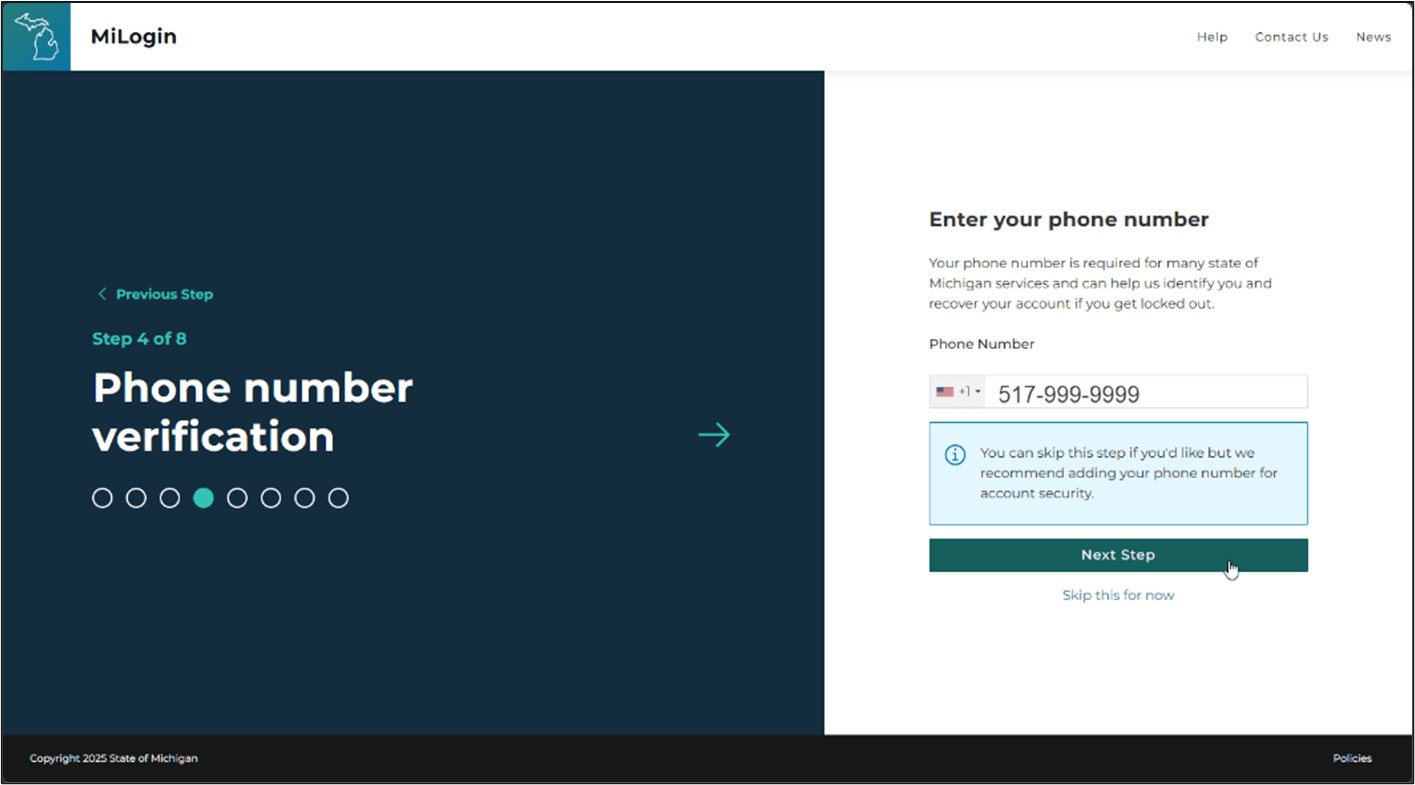
6. To verify your phone number, a one-time passcode will be sent to your phone. You can choose to receive this passcode by way of a text message or voice call. Click on your preferred method to receive the one-time passcode by phone.
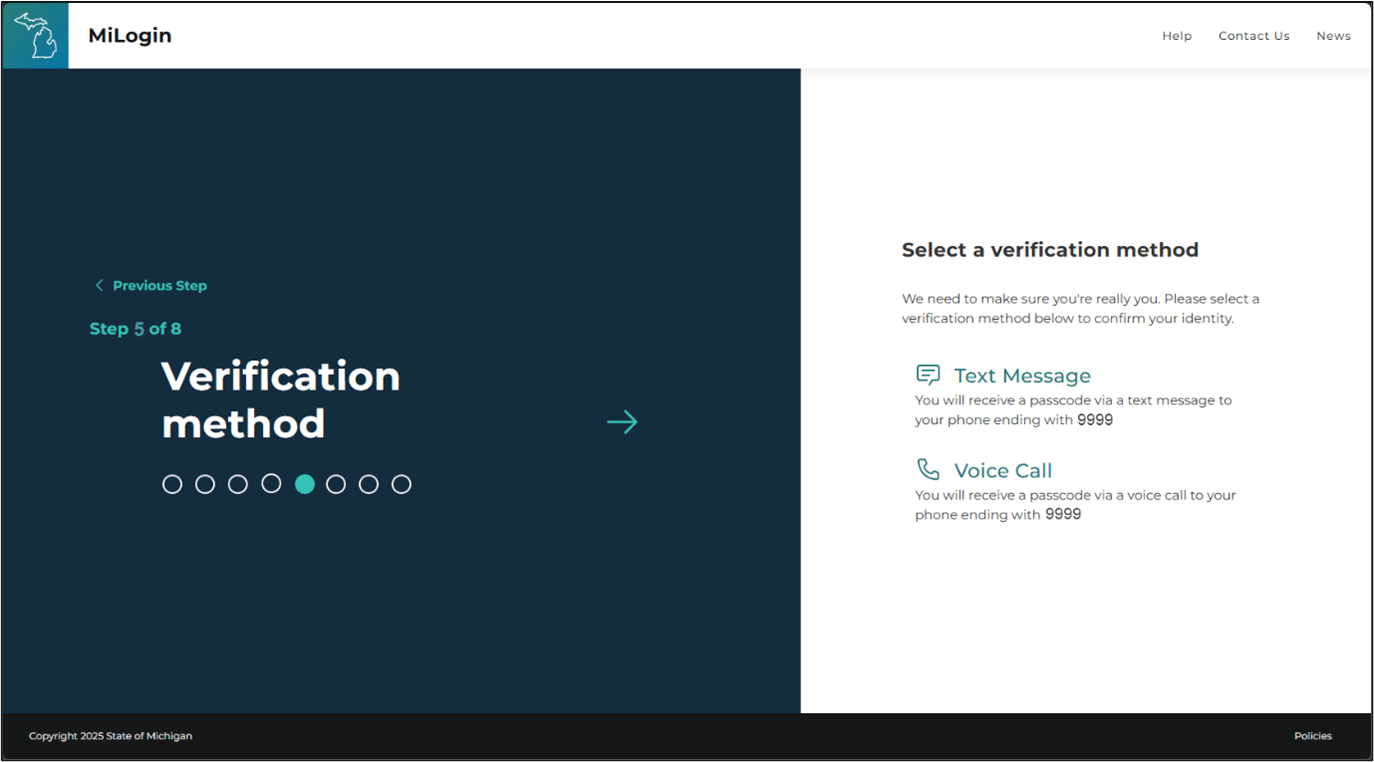
7. Enter the passcode received via text or phone call, then click, Confirm Passcode.
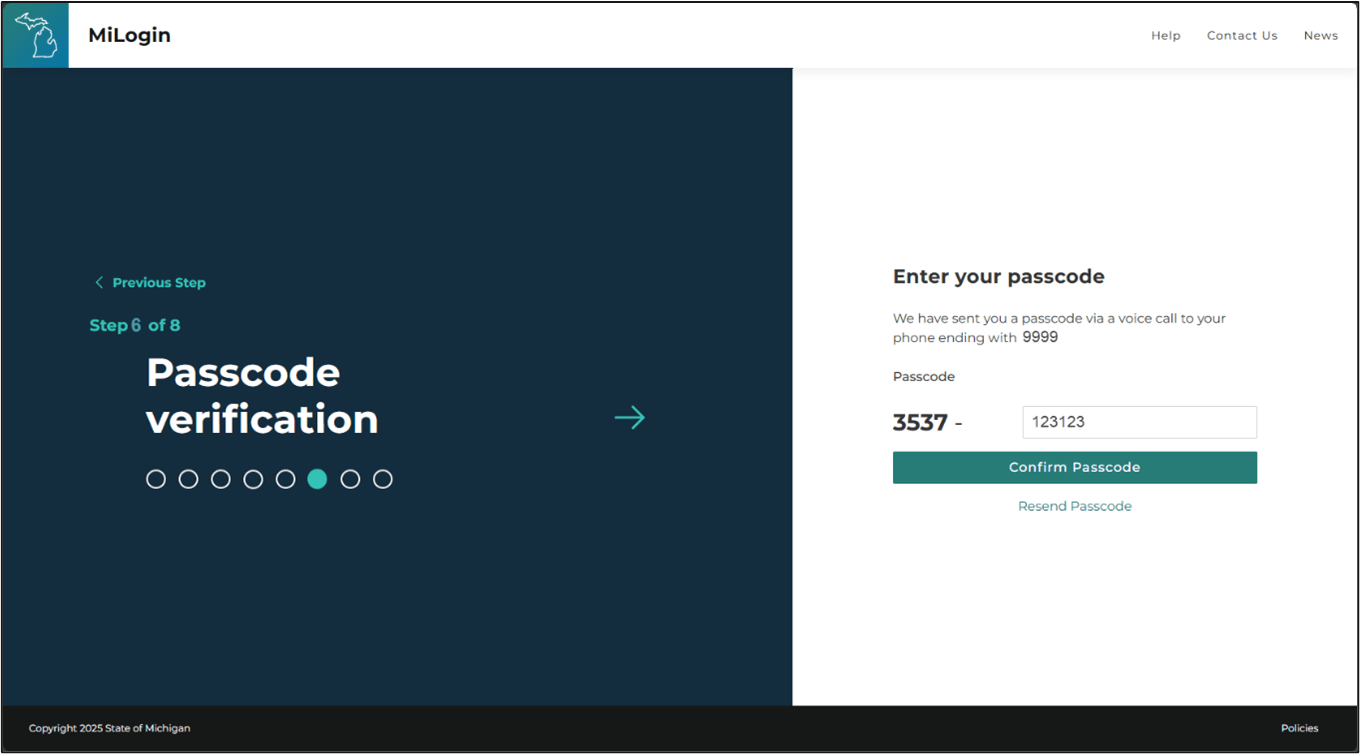
8. Next, create your user ID following the ID guidelines shown. Once you have entered your chosen user ID, and all ID guidelines are checked in green, click, Next Step.
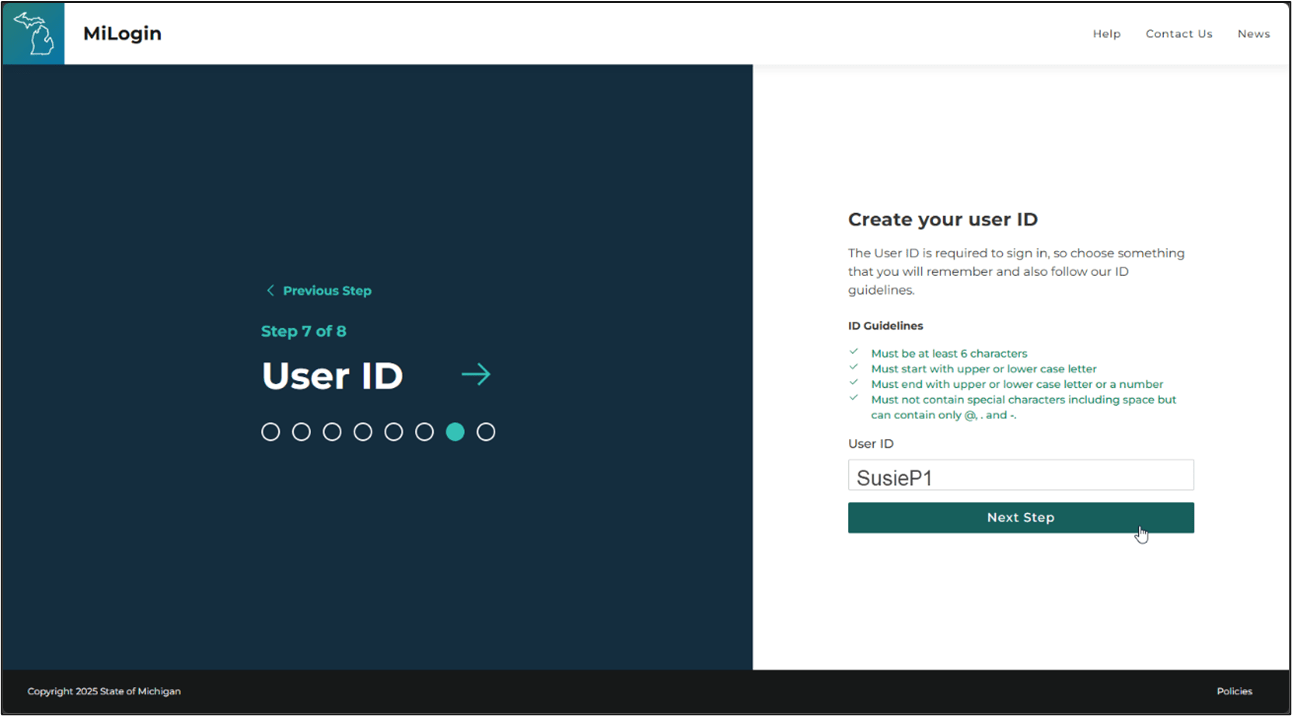
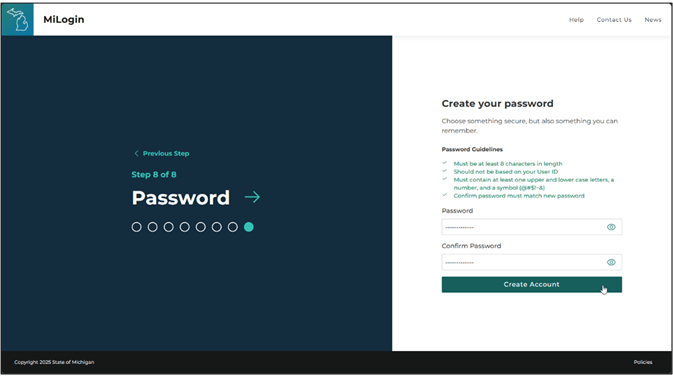
9. Lastly, you will create and confirm your password. Enter a password of your choice following the password guidelines on MiLogin. Once all password guidelines are checked green, click, Create Account.
10. Your MiLogin account has been created! You will see the Welcome homepage of MiLogin after your account is successfully created.
